Remove Mold From Shower Caulk The Right Way
Stubborn black spots on your shower caulk are more than just ugly-they can be a real headache. For a quick fix on surface mold, a scrub with diluted bleach or a mold spray often works. But if the caulk is cracked or the mold is deep-set, the only lasting solution is to cut out the old sealant and apply a fresh, mold-resistant bead.
Your Quick Guide to Banishing Mold From Shower Caulk
Let’s get straight to it. If you're staring down some ugly black spots on your shower caulk, the fastest fix is usually a good scrub. You can grab a commercial mold spray or mix up a simple diluted bleach solution. Just apply it, give it about 10 minutes to work its magic, and then go at it with a stiff brush.
But what if the caulk is cracked, peeling, or the mold seems to have taken over completely? In that case, cleaning is just a temporary solution. For a permanent fix, you’ll need to cut out the old sealant and lay down a fresh, mold-resistant bead.
What You'll Need to Get Started
Before you tackle that mold, a little preparation goes a long way. Having the right tools on hand makes the job easier and, more importantly, safer.
Here’s a quick list of what you should gather:
- Protective gloves to keep harsh cleaners and spores off your skin.
- A potent mold killer, like a commercial spray or a simple bleach-and-water mix.
- A stiff brush or an old toothbrush for getting into the grout lines and corners.
- A sharp utility knife if you decide the old, damaged caulk needs to be removed entirely.
These basics will protect you from direct contact with mold spores and the cleaning agents you're using. And remember, it’s always a smart move to test your cleaner on a small, hidden spot first to make sure it won’t damage or discolor your tile.
Safety First: Always throw on a pair of goggles and a mask before you start. You don't want to breathe in mold spores or get cleaning solution splashed in your eyes.
Comparing Mold Removal Methods
Deciding whether to clean, use a store-bought product, or just rip it all out and start fresh can be tricky. Each approach has its own set of pros and cons, especially when it comes to time and effort.
Here’s a quick breakdown to help you choose the best path forward.
MethodProsConsCure TimeDIY BleachInexpensive and readily available.Can discolor some types of grout or tile.24 hoursCommercial SprayFormulated to kill mold spores effectively and quickly.More expensive than homemade solutions.12 hoursFull RecaulkCreates a brand-new, long-lasting barrier against mold.Takes more time, effort, and a bit of skill.48 hours
Ultimately, the right method depends on how bad the mold is and how much time you have. For a surface-level problem, a good cleaning will do. But for deep-set stains, recaulking is the only way to truly solve it.
When Is It Time to Call In the Pros?
Are you tired of seeing those black spots return no matter what you do? Or maybe the mold has spread to a point where it just feels overwhelming. That's when it might be time to tag in a professional.
Here in the Reno-Tahoe area, our unique climate-from mountain humidity to dry desert air-can create the perfect storm for stubborn mold. If you're dealing with a persistent problem, a maid service in Truckee can provide the deep clean and expertise needed to handle it for good. They have the tools and experience to not only remove the mold but also ensure the new seal is applied perfectly.
Don't let mold win. Book your cleaning with Altitude Cleaning Crew – your trusted maid service in Reno. Call (775) 376-5527.
So, Why Does Mold Love Your Shower Caulk Anyway?
That stubborn black stuff creeping along your shower seals isn't just an ugly stain-it's a living colony, and your bathroom is its favorite vacation spot. Think about it: your shower offers mold a perfect five-star resort experience. It gets constant moisture, warmth from steamy showers, and a free buffet of soap scum and skin cells. This combo is exactly what mold spores need to settle in, put their feet up, and start a family.
The real trouble begins when your caulk starts to get old. Over time, that once-perfect seal can crack, shrink, or pull away from the wall, leaving tiny, almost invisible gaps. These little imperfections are basically an open invitation for water to sneak in behind the caulk, trapping moisture where it can’t evaporate. Here in the Reno and Tahoe area, this can be a particular headache. We get those wild swings from bone-dry desert air to sudden humidity spikes after a summer storm or a big snowmelt, which creates the ideal conditions for mold to thrive in those hidden, damp pockets.
The Ideal Home for Mold Growth
Your shower caulk is essentially the welcome mat for mold. Its surface is just porous enough, and as it ages, it becomes the perfect spot for spores to grab hold. A few key things make it so inviting:
- Non-Stop Humidity: Every time someone takes a shower, a cloud of steam fills the room. This moisture settles everywhere, leaving surfaces damp for hours.
- Stagnant Air: If you don't have a powerful exhaust fan or at least crack a window, all that humid air just hangs around. This keeps the caulk perpetually moist, which is exactly what mold wants.
- A Ready Food Source: Mold isn't picky. It happily feeds on the film of soap scum, shampoo residue, and body oils that naturally build up in a shower.
This isn't just a problem in your home; it's a massive issue globally. The mold remediation market is a huge business, projected to climb past $1.5 billion by 2030. That number alone shows how many people are fighting this exact same battle. You can dig into the mold remediation market data to get a sense of the scale.
Here’s a little secret from the pros: when you see mold on the surface of your caulk, it’s often just the tip of the iceberg. There’s a good chance a much larger colony is growing in the dark, damp space behind it. This is precisely why a quick surface scrub rarely solves the problem for good.
If you want a lasting fix, you have to break the cycle. That means controlling the moisture, getting the air moving, and regularly cleaning away that soap scum buffet. These are the keys to keeping mold from making a comeback. And if the problem seems like it's gotten out of hand, there's no shame in calling for backup.
Book your cleaning with Altitude Cleaning Crew – your trusted maid service in Reno. Call (775) 376-5527.
Gathering Your Tools and Cleaning Solutions
Before you dive in, let's get your gear in order. Trust me, having everything you need within arm's reach makes this job a whole lot less of a headache. You don't need a professional-grade arsenal; a few simple, smart tools will do the trick, especially for the kind of buildup we often see here in the Reno-Tahoe area.
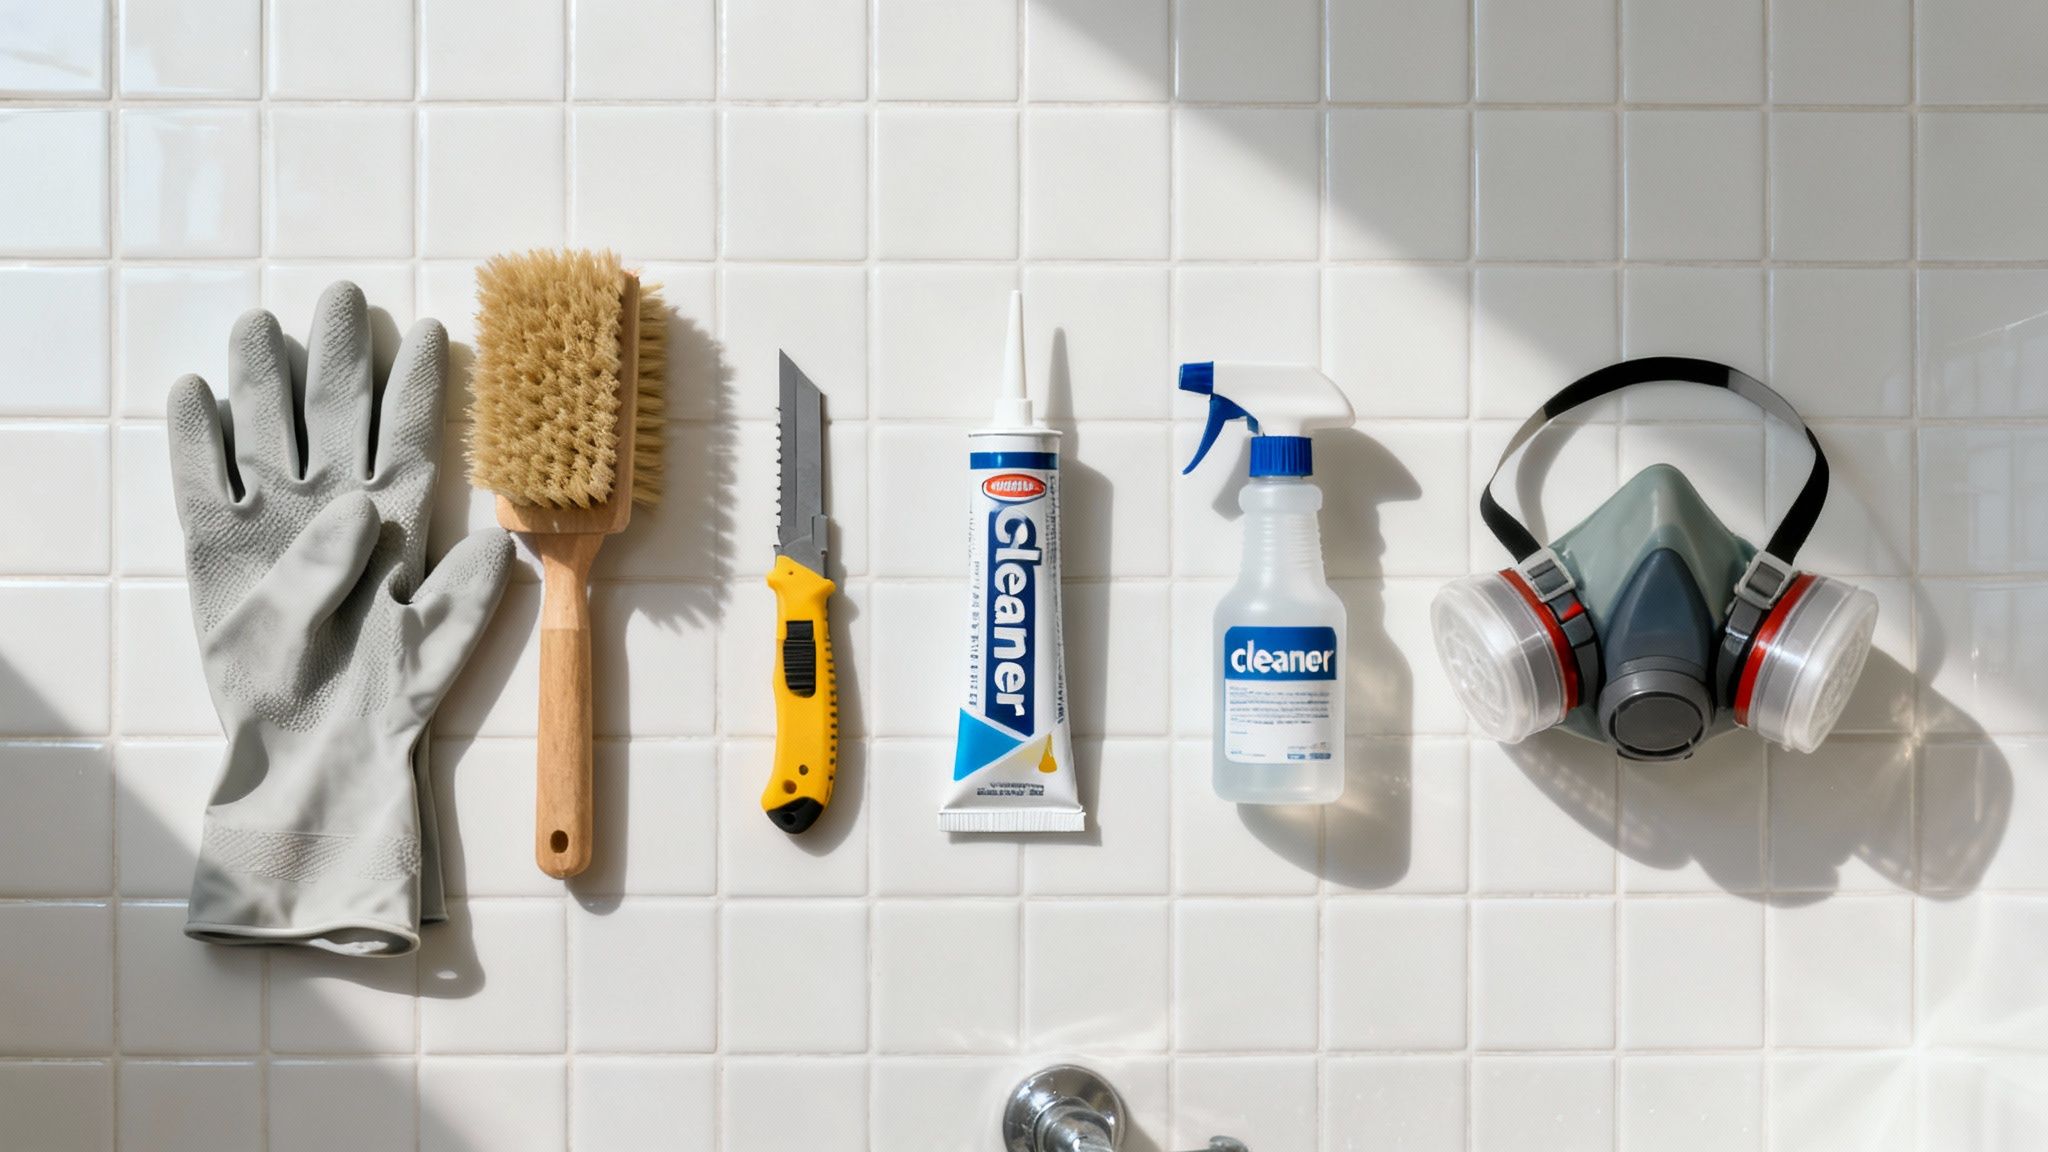
Essential Gear for the Job
First things first: safety. We’re dealing with mold spores and potent cleaners, and that’s not something to take lightly. Protecting yourself is step zero.
- Protective Equipment: Don't even think about starting without waterproof gloves, safety goggles, and a good N95 mask. This isn't optional-it's your defense against breathing in nasty spores and getting harsh chemicals on your skin or in your eyes.
- Scrubbing Tools: A stiff-bristled brush is your best friend for this task. An old toothbrush is also perfect for getting into those tight grout lines and tricky corners where mold loves to hide.
- For Replacement Jobs: Sometimes, the caulk is just too far gone. If that's the case, you’ll need a utility knife or a dedicated caulk removal tool to slice away the old, grimy sealant.
Choosing Your Mold-Fighting Cleaner
Walking down the cleaning aisle can feel overwhelming. The good news is you've got options, from DIY solutions to heavy-duty commercial products. What you choose really depends on how bad the mold is and what you're comfortable using.
A simple paste made from baking soda and white vinegar works surprisingly well on light, surface-level mildew. It's a fantastic, non-toxic starting point, and you can learn more about similar eco-friendly cleaning products in our detailed guide. You probably already have the ingredients in your pantry.
For stubborn, set-in mold, you’ll likely need something with more punch. A diluted bleach solution (1 part bleach to 10 parts water) is a tried-and-true method that effectively kills mold at the source. Commercial mold and mildew removers are also great because their formulas are often designed to cling to the caulk, giving the chemicals more time to work their magic.
To help you pick the right cleaner for your situation, here's a quick breakdown of the most common options.
Choosing Your Mold-Fighting Cleaner
CleanerEffectivenessCostSafety PrecautionsVinegar & Baking SodaGood for light mildew and surface stains.LowMinimal-still best to wear gloves.Diluted BleachHigh-kills mold spores on contact.LowRequires good ventilation, gloves, and goggles.Commercial Mold SprayVery High-designed specifically for mold.MediumMust follow label directions carefully; full PPE is a must.
Ultimately, having the right supplies makes all the difference. Once you're properly equipped, you're ready to get that shower caulk looking clean and healthy again.
And remember, if the job seems too big or you'd rather leave it to the experts, don't hesitate. Book your cleaning with Altitude Cleaning Crew – your trusted maid service in Reno. Call (775) 376-5527.
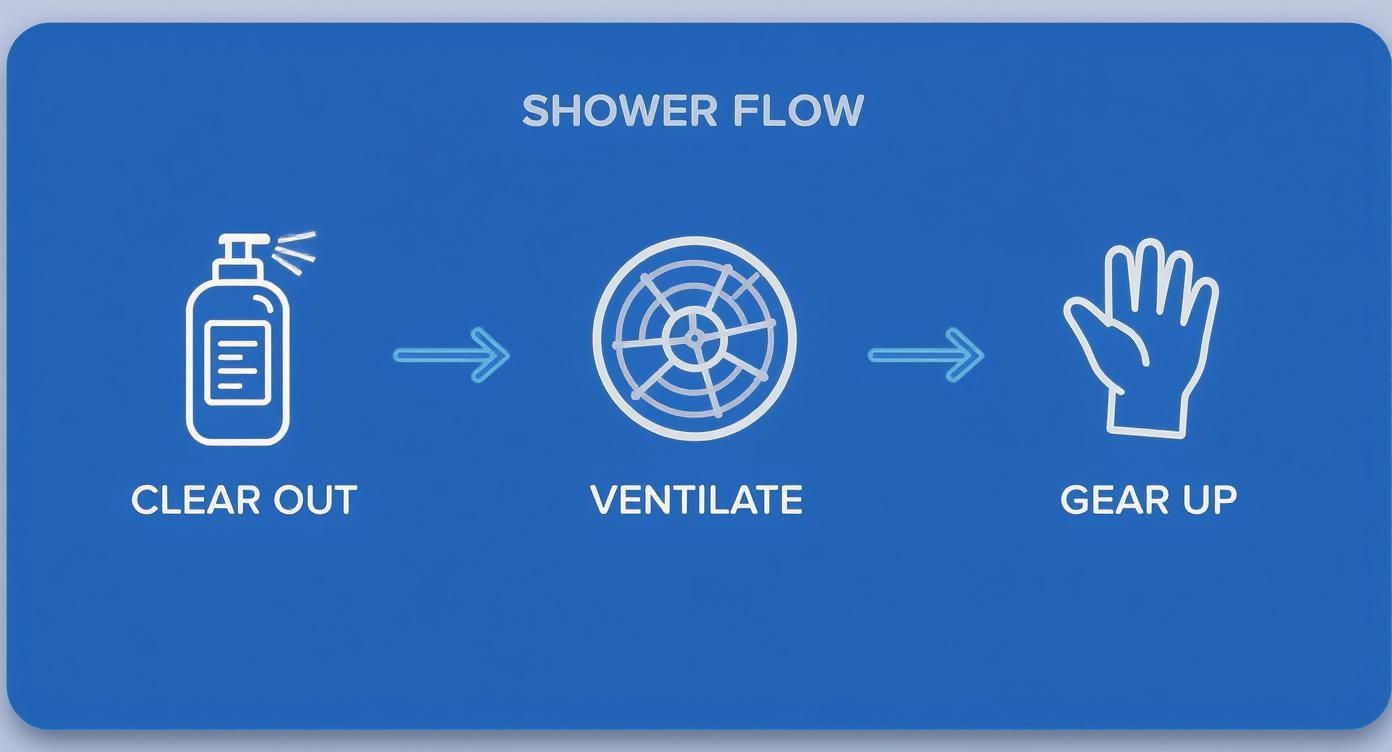
Prepping Your Shower for a Mold-Free Future
Before you even think about grabbing a cleaner, the first step is to get everything out of the shower. It’s amazing how quickly mold can take hold behind a forgotten bottle of shampoo or a loofah hanging on the wall.
So, pull out all the shampoo bottles, soap dishes, razors, and shower caddies. This gives you a clear, unobstructed view of every inch of caulk and prevents mold spores from simply resettling on your stuff.
- Shampoo and conditioner bottles are notorious for trapping water underneath, creating a perfect breeding ground for mildew.
- Razor stands and holders often collect a lovely mix of soap scum and moisture.
- Shower liners, whether fabric or plastic, can hide mold growth on the tile and grout behind them.
Good ventilation is absolutely critical here. Crack open a window or, better yet, flip on that exhaust fan and leave it running. You need to get humid air moving out of the space. Without proper airflow, you're just breathing in cleaning fumes and giving loosened mold spores a chance to float around and land somewhere new.
Suit Up: Your Safety Gear Checklist
Don't underestimate mold. Even a little bit can kick up an allergic reaction or irritate your lungs. Taking a few minutes to gear up properly is non-negotiable.
You'll want a solid pair of rubber gloves (the kind you'd use for dishwashing or heavy cleaning are perfect), safety goggles to protect your eyes from splashes, and an N95 mask to keep you from inhaling any airborne spores.
- Gloves create a barrier between your skin and the harsh cleaners.
- Goggles are a must to prevent accidental splashes of bleach or vinegar from getting in your eyes.
- An N95 mask is your best defense against breathing in microscopic mold particles.
Pro Tip: A little preparation now saves you a lot of coughing and sneezing later. It's a simple step that makes a huge difference.
Before you start scrubbing, run through this quick mental checklist:
- Is the shower completely empty?
- Is the exhaust fan on or a window open?
- Are my gloves, goggles, and mask on and fitted correctly?
- Have I laid down old towels outside the shower to protect the floor?
- Is a small bucket of clean water nearby for rinsing?
The Pre-Clean: Wiping the Slate Clean
Before you hit the mold with your chosen cleaner, give the caulk and surrounding tile a quick pre-clean. This gets rid of any surface-level soap scum and grime, allowing your mold-killing solution to work directly on the problem.
A simple 50/50 mix of white vinegar and water in a spray bottle works great for this. Just spritz it on, let it sit for about five minutes, and wipe it down with a cloth.
Crucially, always test your cleaner on a small, hidden spot of caulk first. You want to make sure it won’t cause any discoloration or damage to your tile or grout before you apply it everywhere.
For more tips on getting the entire space ready, check out our complete guide on how to deep clean a bathroom.
Once you're ready, gather your tools-scrub brush, cleaning solution, and your rinse bucket-and keep them within arm's reach. A little bit of organized prep work makes the entire process of removing mold from your Reno shower go much more smoothly and safely.
A Practical Guide To Removing And Replacing Caulk
Now that you’ve cleared out the shower and donned your safety gear, it’s decision time: Can a thorough clean tackle the mold, or is it better to start fresh with new caulk? Below, you’ll find hands-on tips and pro tricks for both routes, ensuring a polished result.
Gather your cleaning solution-whether that’s a bleach mix or a store-bought mold killer-and pour it into a spray bottle for even application. Target every dark spot you see, then let it work its magic for 10-15 minutes. This dwell time is crucial for loosening stubborn growth. For a deeper dive, check out this step-by-step tutorial.
These essentials-clearing space, ensuring airflow, and suiting up-set the stage for faster, safer cleaning.
Scrubbing Without Damaging Surfaces
When the solution has had time to penetrate, switch to a stiff-bristled brush or an old toothbrush. Work in tight sections, applying firm pressure to lift away loosened mold without scratching grout or tile.
Key focus areas:
- Tile-to-tub seams
- Around faucets and fixtures
- Inside corners where moisture hides
Don’t hesitate to reapply cleaner if you hit a stubborn patch. A quick five-minute soak can make all the difference.
Once the mold is agitated, rinse thoroughly with a detachable shower head or a bucket of fresh water. Finally, dry every inch with towels or a fan to stop moisture from settling back in.
Recognizing When To Replace Old Caulk
Sometimes scrubbing only scratches the surface. If the mold stain still shows after cleaning, or if you spot any cracks, gaps, or soft, peeling caulk, it’s time to remove and replace.
Look for:
- Deep, Embedded Stains: Black mold clinging beneath the surface.
- Visible Cracks Or Gaps: Space where the sealant has shrunk away.
- Peeling Or Gummy Texture: Caulk feels soft, brittle, or comes off in strips.
Catch any of these warning signs, and you’ll know that a full swap-out is the only long-term fix.
How To Apply A New Bead Of Caulk
Removing the old sealant correctly makes all the difference. Use a utility knife or caulk-removal tool to slice along both edges, then pull the caulk out in long, continuous strips.
Next:
- Scrape away leftovers and wipe the joint clean with rubbing alcohol to ensure proper adhesion.
Now you’re ready for fresh sealant. Load your caulk gun with 100% silicone, mold-resistant caulk, cut the tip at a 45-degree angle, and apply steady, even pressure along the seam. Smooth the bead right away with a damp fingertip or a finishing tool. Keep the area dry and let it cure fully-usually 24 hours-before introducing water.
Tackling moldy caulk can be tedious, but the payoff is a spotless, healthy shower. If this project seems too big or you’d simply prefer expert hands, reach out for help.
Book your cleaning with Altitude Cleaning Crew – your trusted maid service in Reno. Call (775) 376-5527.
Keeping Mold Away with Smarter Maintenance
You’ve put in the work to get your shower caulk looking brand new, and the last thing you want is for that ugly black mold to creep back in. The real secret to keeping it gone for good isn’t about more scrubbing-it’s all about smarter prevention.
By picking the right materials and building a simple daily habit, you can turn your shower into a place mold simply can’t thrive. This is a game-changer, especially here in the Reno-Tahoe area where our climate’s humidity swings can create the perfect storm for mildew.
Your best first move? Investing in a quality 100% silicone mold-resistant caulk. These aren't your grandpa's caulks; they're specifically engineered to repel water and stop mildew growth before it ever gets a foothold, giving you a powerful, long-term defense.
Proactive Steps for a Healthier Shower
At its core, preventing mold is just about managing moisture. A few small habits, done every day, can make a massive difference and keep your new caulk looking pristine for years.
- Wipe It Down: Grab a small squeegee or a microfiber cloth and keep it right in the shower. After you're done, take 30 seconds to wipe down the walls, glass, and especially those caulk lines. This simple step removes the standing water that mold absolutely needs to grow.
- Boost Your Airflow: A steamy bathroom is a moldy bathroom, plain and simple. Always run your exhaust fan while you shower and let it run for at least 20-30 minutes afterward. No fan? No problem. Cracking a window open will do the trick and vent all that damp air outside.
The use of mold-resistant caulks is now widely seen as a cost-effective, long-term fix for bathroom mold. Many advanced formulas contain slow-release biocides that actively protect against mold and mildew for the entire life of the sealant. You can find more details about these advanced caulk technologies.
These little adjustments completely disrupt the environment mold is looking for. Before you know it, they’ll become second nature, saving you from that frustrating cycle of constantly having to deep clean. You can also dive into our other guides on how to clean shower mold and mildew effectively.
When Maintenance Isn't Enough
Even with the best habits, life in our mountain towns can get messy. Between the dust from desert winds and the mud after Tahoe snow, our bathrooms really take a beating.
If you find that mold keeps coming back no matter what you do, it might be a symptom of a larger problem. You could be dealing with a hidden leak behind the wall or ventilation that just isn't cutting it-issues that often need a professional eye.
For those times when you just need a total reset or want the peace of mind that comes with a pro's touch, our house cleaning Reno NV team is ready to step in. We have the experience to not only get things sparkling clean but also to spot potential problem areas you might have missed.
Book your cleaning with Altitude Cleaning Crew – your trusted maid service in Reno. Call (775) 376-5527.
Still Have Questions About Shower Mold?
Even with the best guide, it's normal to have a few questions pop up, especially when you're staring down some stubborn mold. I get these all the time from homeowners around Reno, so let's clear up some of the most common ones.
How Often Should I Be Cleaning My Shower Caulk, Really?
In a perfect world, you'd give your shower a quick squeegee or wipe-down with a towel after every single use. That's the best defense. But let's be realistic-mountain-town weekends are for hiking and skiing, not constant cleaning.
For a deeper, mold-preventing clean, make it a weekly habit. A quick scrub once a week is usually enough to stop mold from getting a foothold. This simple routine is key, especially here in Reno where the air can go from bone-dry to surprisingly humid in a flash.
Why Are These Black Stains So Stubborn?
You've tried everything-vinegar, bleach, specialty cleaners-and scrubbed until your arm aches, but those ugly black stains are still there. I've been there, and it's incredibly frustrating.
If the stains won't budge, it's because the mold isn't just on the surface anymore; it has grown into the caulk. The silicone is porous, and once the mold sets its roots deep inside, no amount of surface scrubbing is going to get it out. The stain is now part of the material.
Expert Tip: When you can't scrub it away, the caulk itself has failed. The only real fix at this point is to cut out the old, stained sealant completely and lay down a fresh bead of new, mold-resistant caulk.
When Is It Time to Call in a Professional?
Deciding between DIY and calling for help often comes down to a few key things. It’s probably time to bring in a pro if the mold seems to cover a large area, if it comes roaring back right after you clean it, or if you just don't have the time or patience for a meticulous recaulking job.
Sometimes, stubborn mold is a red flag for a bigger problem, like a hidden leak or a bathroom ventilation issue that needs addressing.
A professional house cleaning Reno NV service, like our team at Altitude Cleaning Crew, has the right tools and years of experience to not only get rid of the mold but to lay down a perfect, professional-grade bead of caulk. We make sure you get a clean, durable seal that’s ready to handle everything from Tahoe mud to desert dust.
When DIY feels like one chore too many, let us take it off your plate. Altitude Cleaning Crew offers expert cleaning services to get your bathroom looking brand new and give you back your peace of mind.
Book your cleaning with Altitude Cleaning Crew – your trusted maid service in Reno. Call (775) 376-5527.
Flat-Rate House Cleaning Services You Can Count On
From downtown Reno apartments to family homes across Sparks, our team delivers reliable, professional house cleaning you can count on.