The Best Way to Remove Drywall Dust
TL;DR: The only way to beat drywall dust is a multi-step process: contain the mess, vacuum everything with a HEPA-filter vacuum, and wet-wipe every surface from the ceiling down. Just grabbing a broom will make it worse, spreading fine particles everywhere that will haunt you for weeks.
Your Guide to Conquering Drywall Dust
So, the renovation is finally done. Awesome! Whether you just patched a small hole in your Sparks bungalow or finished a major remodel with a view of Lake Tahoe, you’re now facing the project's dreaded final stage: a fine, powdery layer of drywall dust that has somehow coated everything. Here in Northern Nevada, we're used to dust from desert winds, but this stuff is different-incredibly fine, notoriously stubborn, and seems to reappear out of thin air.
Here’s the thing most people learn the hard way: trying to clean it with a dry cloth or a broom is a losing battle. You’ll just send the dust airborne, allowing it to settle right back down on every surface and, even worse, get sucked into your home's HVAC system. A proper cleanup isn't about brute force-it's about having the right strategy and the right tools.
Drywall Dust Cleanup At a Glance
Getting rid of drywall dust for good means following a very specific sequence of containment, dry removal, and detailed wet cleaning. This methodical approach is the secret to actually capturing the dust instead of just endlessly pushing it around. It's the difference between a project that's truly finished and one where you're still finding a dusty film on your TV screen a month from now, especially after tracking in mud after Tahoe snow.
To give you a clear picture, here's a quick overview of the core stages.
StageKey ActionPrimary ToolContainmentSeal off the work area from the rest of the house.Plastic sheeting & painter's tapeDry RemovalVacuum all surfaces to capture loose particles.HEPA-filter vacuumWet CleaningWipe down every surface to trap remaining dust.Microfiber cloths & mopAir QualityChange HVAC filter and purify the air.New furnace filter
Following these steps in order is your best bet for reclaiming your space from that persistent dust cloud, letting you finally enjoy your beautiful new room. Of course, for bigger projects or when you’d rather spend your mountain-town weekends enjoying the scenery instead of cleaning, calling in a professional team to handle the entire post-construction mess is always a smart move.
Book your cleaning with Altitude Cleaning Crew – your trusted maid service in Reno. Call (775) 376-5527.
Preparing Your Home Before the Cleanup
Let me tell you, the real secret to conquering drywall dust isn't about the cleaning-it's all about the prep. Seriously. An hour spent on containment now will save you from a whole weekend of chasing that ghostly white powder around your house. The goal here is simple: lock down the work zone so that fine dust can't escape and settle everywhere.

First things first, get everything you can out of the room. For the big, heavy stuff that's staying put, don't just throw a sheet over it. Cover it completely with thick plastic sheeting and use painter's tape to seal every edge. You're aiming for an airtight cocoon.
While you're at it, protect your floors. I recommend rosin paper or some heavy-duty plastic, taping all the seams. This pulls double duty, shielding your floors from dust and saving them from accidental scuffs. It's the same kind of careful prep you'd do for other messy projects, like the containment needed for cleaning a popcorn ceiling.
Seal Off the Renovation Zone
Now, let's isolate the room from the rest of your home. You need to create a physical barrier. Use plastic sheeting to cover every doorway leading out of the space, securing the edges all the way around with painter's tape.
If you need to get in and out, you can create a makeshift "airlock" by cutting a slit down the middle of the plastic and installing a stick-on zipper. It sounds extra, but it works wonders.
Here's a pro tip we use on job sites all the time: Create negative air pressure. Set up a box fan in a window so it's blowing out. Seal the gaps around the fan with cardboard or plastic. When you switch it on, it will pull air out of the room, preventing the dust from drifting into other areas of your house.
Shut Down Your HVAC System
This is the one step you absolutely cannot skip. Before you do any sanding or start the cleanup, turn off your HVAC system at the thermostat. You need to kill all air circulation.
If you forget this, your HVAC system will become a superhighway for dust, inhaling it and blasting it into every single room. You’ll be finding that fine powder for months.
Go a step further and seal every supply and return air vent in the work area with plastic and tape. Your furnace filter is no match for this stuff; it'll get clogged in minutes, and the rest will settle deep inside your ductwork. Taking this one action can prevent a small, localized mess from turning into a massive, house-wide contamination.
Once you’ve got the space fully prepped and contained, you're ready for the actual cleaning. But trust me, without laying this critical groundwork, you’re just signing up for a long, frustrating battle against a never-ending cloud of dust. And for those really big projects in Carson City or Incline Village where it all feels like too much, remember that calling in a pro for a post-construction cleanup is always a smart move.
Gathering the Right Tools for the Job
If you've ever tried to clean up drywall dust with the wrong gear, you know the soul-crushing feeling of watching that fine white powder resettle two minutes after you've "cleaned" it. It's a special kind of frustrating. You’ll spend hours chasing it around, only to lose the battle.
To actually win, you need an arsenal built to trap and remove these ultra-fine particles, not just stir them up. Your standard broom and household vacuum are your enemies here-they just kick the dust into the air, making a bigger mess and turning your lungs into a filter.
The Most Critical Tool: A HEPA Vacuum
Let's be clear: a vacuum with a HEPA (High-Efficiency Particulate Air) filter is not optional for this task. It is the absolute cornerstone of a successful cleanup.
So, what’s the big deal? A regular vacuum filter simply can't handle particles this small. It sucks them off the floor, churns them through the machine, and blasts them right back into the room through the exhaust vent. A true HEPA filter, however, is engineered to capture a whopping 99.97% of particles down to 0.3 microns. It traps the dust, and the dust stays trapped.
The difference this makes is staggering. Research from the Construction Safety Association of Ontario found that simply attaching a vacuum system to a sanding tool dropped airborne dust levels by 96%. While that study focused on dust creation, it perfectly illustrates how vital proper vacuum filtration is to your air quality. You can dive deeper into the data on drywall dust exposure here.
Your Wet-Wiping Arsenal
Once the bulk of the dust is gone, the next phase is capturing the stubborn film left behind. This is where meticulous wet-wiping comes in.
- Microfiber, Microfiber, Microfiber: Ditch the cotton rags. The split fibers in microfiber create a static charge that actively grabs and holds onto dust particles. You’ll want a big stack of cloths for surfaces and a good microfiber mop for the floors.
- The Two-Bucket Method: This is a non-negotiable pro-level technique. You need one bucket with your cleaning solution and a second bucket filled with clean water for rinsing your dirty cloth or mop. This simple step stops you from just spreading dirty water all over your clean surfaces.
- Tack Cloths: For that final pass on finished wood trim or cabinetry, a tack cloth is your secret weapon. It’s a slightly sticky resin-coated cloth that picks up the last tiny specks of dust without leaving any residue.
A quick but important note on safety: Protect yourself. Drywall dust is incredibly irritating to your lungs and eyes. An N95-rated mask is a must, and a good pair of safety glasses will save you a lot of discomfort.
Taking the time to get these specific tools ready beforehand will make the entire process faster and far more effective. Of course, if you're looking at a huge mess or just don't want the headache, bringing in a professional house cleaning Reno NV service is the fastest way to get your home back to normal.
Book your cleaning with Altitude Cleaning Crew – your trusted maid service in Reno. Call (775) 376-5527.
A Methodical Approach to Cleaning Surfaces
Alright, with the prep work out of the way and your tools ready, it’s time to tackle that dust. The real secret here isn't about working harder; it’s about working smarter. The best way to get rid of drywall dust for good is to stick to a strict top-to-bottom, dry-then-wet sequence. This strategy ensures you’re actually capturing the dust, not just chasing it around the room.
First up is the dry removal. Grab your HEPA vacuum and pop on the soft brush attachment. You'll want to start with the ceilings, using slow, overlapping strokes to suck up all that loose powder. Once the ceiling is done, move down to the walls, repeating the same careful process. Make sure to get into every corner, along the tops of door frames, and over light fixtures-basically, any high place where dust has had a chance to settle.
The Dry-First Vacuuming Process
Think of this initial vacuuming pass as the heavy lifter. It’s designed to remove the vast majority of the particles, which makes the next phase-wet-wiping-so much more effective. If you skip this, you’ll just turn the thick layers of dust into a pasty, smeary mess the second you introduce a damp cloth.
During this initial dry-pass, really focus on these hotspots:
- Ceilings and High Corners: Dust seems to defy gravity, and you'll find it clinging everywhere up high.
- Walls and Trim: Give extra attention to baseboards, window sills, and door casings where dust loves to collect.
- Light Fixtures and Ceiling Fans: The blades and shades on these are notorious dust magnets.
- Inside Cabinets and Closets: Don't forget these! Open every door and vacuum all the interior shelves and surfaces.
This detailed first pass is a lot like the prep work you'd do for a thorough deep house cleaning; getting that first layer of grime off is absolutely essential for achieving a truly clean finish.
This visual guide breaks down the core tools and how they fit into the cleaning sequence.
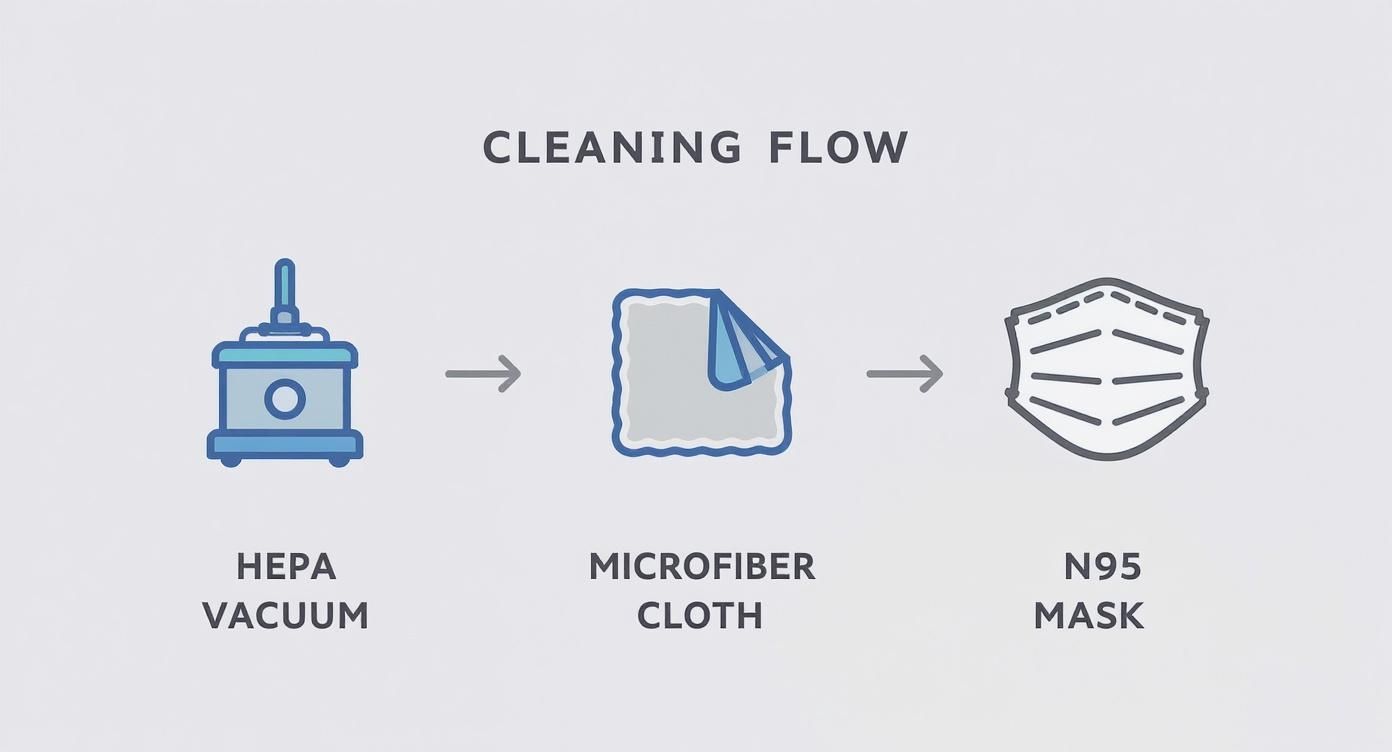
The flow is simple but effective: vacuum first, then wipe, all while wearing the right protective gear to keep yourself safe.
Mastering the Two-Bucket Wet-Wiping Method
Now for the final touch that makes all the difference. Wet-wiping is what traps that fine, stubborn film of dust that even the best HEPA vacuum can't grab. But there’s a right way and a very wrong way to do this. The wrong way involves using a single bucket of water that gets progressively filthier, which just ends up smearing a thin layer of grime over everything.
The right way is the two-bucket method. It’s a classic for a reason. Fill one bucket with your cleaning solution (a few drops of mild dish soap in warm water is perfect) and a second bucket with clean rinse water.
Here’s how it works:
- Dip a clean microfiber cloth into your soap-and-water bucket.
- Wring it out until it’s just damp, not sopping wet.
- Wipe down a section of a wall or another surface, always starting from the top.
- Now, here's the key: before you dip that cloth back into the soap bucket, rinse it out completely in the clean water bucket. Wring it out thoroughly.
- Repeat the whole process, and be sure to change out your rinse water as soon as it starts looking cloudy.
This simple technique is a total game-changer. It guarantees you’re always using a relatively clean cloth, which is the only way to actually lift the dust off the surface instead of just pushing it around. And it's not just a folk remedy-a comprehensive review of dust control methods found that wet-wiping can slash airborne dust concentrations by a staggering 50-70%.
Always remember: Gravity is both your best friend and your worst enemy in this fight. Clean from the highest point in the room to the lowest. Ceilings first, then walls, then furniture and fixtures, and save the floors for the very end. This ensures you aren't knocking dust down onto an area you’ve already spent time cleaning.
How to Clean Your HVAC System and Air
You've wiped, vacuumed, and mopped every surface in sight, but the job isn't quite done. The most stubborn, microscopic drywall dust has found its way into the one place you can't easily see: your HVAC system. If you skip this part, your furnace or AC will happily blow that fine white powder back into every room for weeks, and all your hard work will be for nothing.
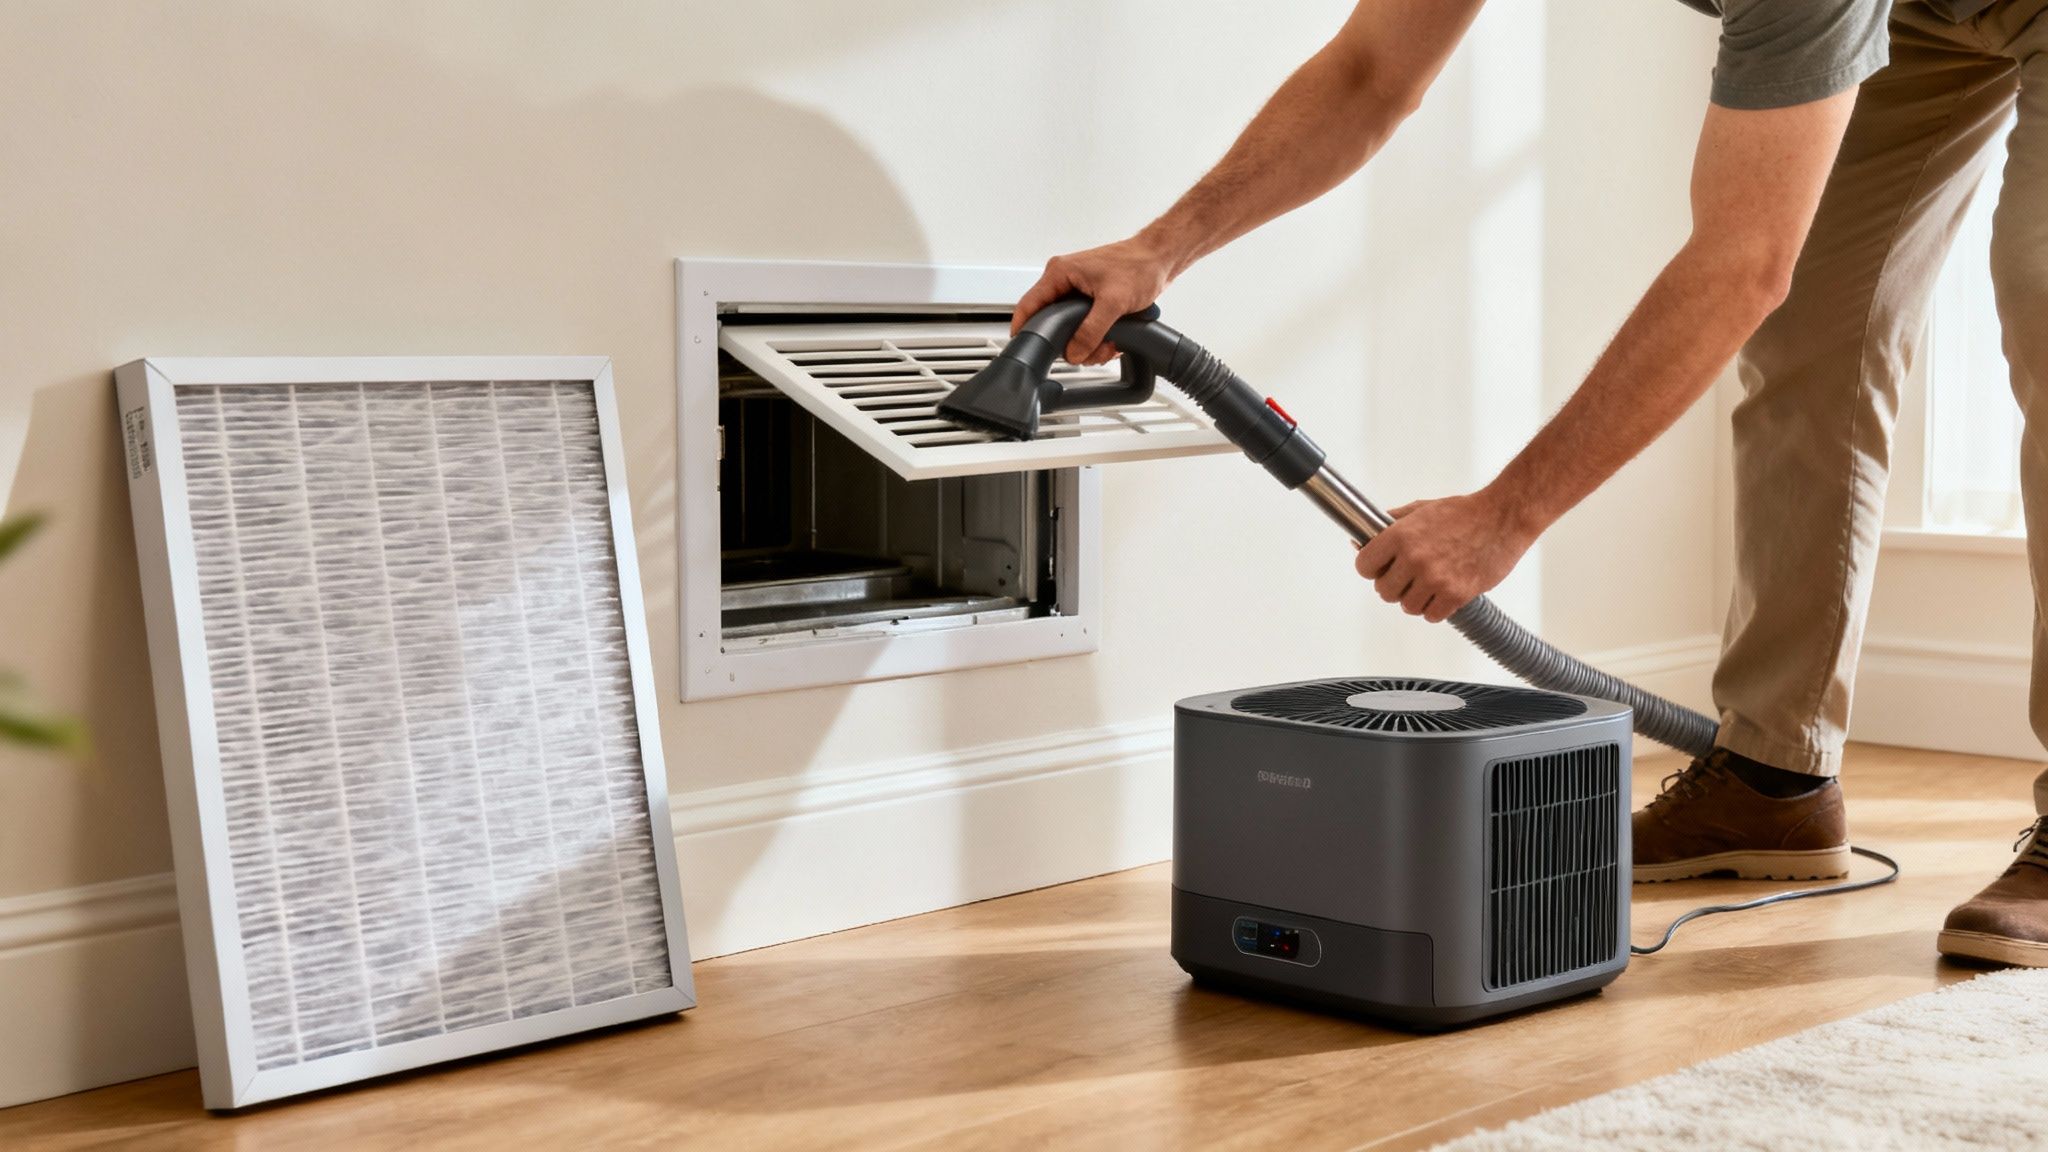
This last phase is all about making sure the air is truly clean. The first thing to tackle are the air vents and registers in the room where you did the work. Make sure your HVAC system is still turned off. Then, grab your HEPA vacuum and use the brush or crevice tool to get deep inside each vent, sucking up as much dust as you can reach. Finish by wiping the grilles down with a damp microfiber cloth to catch any remaining residue.
The Most Important Step: Change Your Furnace Filter
If you do just one thing from this entire section, please make it this: replace your furnace filter immediately. I can almost guarantee your old filter is caked with a thick layer of drywall dust. Running your system with a filter that clogged is terrible for the unit-it puts a massive strain on the motor-and it won't capture any more dust.
A new, clean filter is your number one defense against blowing all that grime right back into your home. As a good rule of thumb, check that new filter weekly for the first month after the project. If it looks dirty, change it again. It's a small price to pay for your home's air quality.
Clearing the Air for Good
With the vents clean and a fresh filter in place, it's time to deal with any dust that's still floating around. An excellent way to handle this is to run a portable HEPA air purifier in the renovated room for at least 24-48 hours. This step is a lifesaver, especially if anyone in your home has allergies or asthma.
A quick heads-up: If you forgot to seal off your vents before the drywall work started, there's a good chance a lot of dust settled deep inside your ductwork. In that situation, you really should look into hiring a professional duct cleaning service. It’s the only way to prevent long-term air quality problems.
Of course, the best strategy is always to stop the dust before it starts. For example, CDC research has shown that using modern ventilated sanders can cut airborne dust by up to 88% compared to old-school sanding blocks. You can check out the full study on dust reduction techniques here for more insights.
Taking these final steps is what makes the difference between a pretty good cleanup and a truly professional one, ensuring the air you breathe is as pristine as your new walls.
Book your cleaning with Altitude Cleaning Crew – your trusted maid service in Reno. Call (775) 376-5527.
When to Call in the Pros
You've followed all the steps, invested in the right gear, and dedicated your weekend to the cleanup. But sometimes, even the most diligent DIY effort isn't enough to conquer the sheer volume of drywall dust.
Tackling a small patch-and-paint job in Verdi is one thing. Cleaning up after an entire multi-room renovation in South Lake Tahoe is a different beast entirely. Knowing when to wave the white flag and call a professional is just as crucial as knowing how to do it yourself.
Think about the scale of your project. If you've just spruced up a single room, a solid weekend of cleaning will probably do the trick. But for a whole-house remodel, a basement finish, or a new addition, the amount of dust is often beyond what consumer-grade tools can handle. Professionals roll in with commercial-grade HEPA vacuums and industrial air scrubbers that are leagues more powerful than anything you can buy at a big-box store. That means a deeper, faster, and more thorough clean.
Scenarios That Warrant a Professional
The decision isn't always about the size of the mess-it's also about health, time, and sanity. Your time is valuable, and spending days on end covered in a fine white powder isn't exactly the best way to enjoy our beautiful mountain towns.
Here are a few clear signs it’s time to call for backup:
- Large-Scale Renovations: When dust has blanketed multiple rooms or an entire floor, a pro team can work systematically to clear it all out in a fraction of the time it would take you alone.
- Household Health Concerns: If anyone in your home deals with allergies, asthma, or other respiratory issues, kicking all that dust back into the air is a real risk. A professional service uses containment and air filtration methods to ensure the air quality is safely restored for everyone.
- Lack of Time or Energy: Let's be honest. After the stress, decisions, and disruption of a renovation, the last thing you want is a massive cleaning project. Outsourcing that final step lets you reclaim your life and your new space much faster.
- No Access to Proper Equipment: Renting or buying a true HEPA-filter vacuum and other specialized tools can get expensive fast. A professional cleaning service arrives with everything needed to do the job right the first time.
The real value of a professional service isn’t just about cleaning—it’s about peace of mind. Knowing the job is done correctly, with no lingering dust to worry about, allows you to finally relax and enjoy your newly renovated space.
A team that specializes in this kind of cleanup knows all the sneaky places dust hides-inside light fixtures, along the top of window casings, and deep within your HVAC system. It’s that obsessive attention to detail that really makes the difference.
Altitude Cleaning Crew offers specialized post-construction rental cleaning designed specifically for the unique challenge of fine particulate dust. We bring the right expertise and equipment to restore your home, so you don't have to.
Book your cleaning with Altitude Cleaning Crew – your trusted maid service in Reno. Call (775) 376-5527.
Got Questions About Drywall Dust? We've Got Answers
After a big project, you’re bound to have a few questions about the cleanup. Let's tackle some of the most common ones we hear from homeowners dealing with that fine, white powder.
Can I Just Grab a Broom and Dustpan?
I know it's tempting to reach for the old broom and dustpan, but please don't. This is hands-down one of the biggest mistakes you can make.
A broom will just launch those microscopic drywall particles straight into the air. They'll float around for hours, only to land right back on the surfaces you just tried to clean. Even worse, that airborne dust gets pulled directly into your HVAC system, spreading it throughout the entire house.
The only real solution here is a vacuum equipped with a HEPA filter. These are specifically designed to trap those tiny, pesky particles instead of just spitting them back out.
How Long Should I Wait Before I Start Cleaning?
This is where a little patience goes a long way. You really want to wait at least 24 hours after the sanding stops before you start your cleanup. This gives almost all of that airborne dust a chance to finally settle.
If you start cleaning too early, you’re just fighting a floating cloud of dust. Let gravity do the hard work for you first.
Waiting for the dust to settle isn't just a saying-it's the first rule of an effective post-renovation cleanup. It means you're actually capturing the dust instead of just chasing it around the room.
Is It Safe to Clean Up Drywall Dust on My Own?
For sure, as long as you protect yourself properly. The main concern is inhaling the fine silicate particles, which you definitely want to avoid. That means wearing the right personal protective equipment (PPE).
Here's the essential gear:
- An N95-rated mask is non-negotiable. It protects your lungs.
- Safety glasses or goggles will keep that irritating dust out of your eyes.
With the right gear, a DIY cleanup is totally manageable. Of course, if the project was massive or you'd just rather not deal with it, a professional maid service Truckee like ours can get it done right.
Book your cleaning with Altitude Cleaning Crew – your trusted maid service in Reno. Call (775) 376-5527.
Flat-Rate House Cleaning Services You Can Count On
From downtown Reno apartments to family homes across Sparks, our team delivers reliable, professional house cleaning you can count on.